Template: Weekly Binary Compensation Plan XML
Download the full XML template
This resource breaks down some essential pieces of the preceding XML template. The goal is to make your path a little easier on your way to creating your own Weekly Binary Compensation Plan.
⚠Important
This template is for reference only. It's a starting point to develop your compensation plan for your business rules.
Overview
Binary Compensation Plans have a two-legged structure. Its namesake comes from the Binary Tree Data Structure. Following this structure, an Associate starts with two people enrolled right below them. One on the left and one on the right. The following image demonstrates this principle:

An Associate can enroll more people, but they must place them in the next available spot, further down in either Left or Right Leg.

The beauty of Binary comp plans is that it's not based on your level. Sponsors and their downline are on the same team. Each member invests in the other's success because everyone will benefit. The volume moves up the Leg to the Sponsor Associate. The Sponsor would earn volume from Associates even if they didn't enroll them. Their downline benefits from new members in their Tree they didn't have to enroll.
The upline Associate can still enroll a new member in their downline. They have to choose where to place the new enrollee in the Tree.
The ultimate goal is to keep the two Legs balanced. A better-balanced tree will lead to more volume accumulation. Inevitably, the Tree begins to develop a Strong Leg and a Weak Leg. One Leg flourishes, while the other can't keep up. This imbalance can cause a large amount of rollover volume, week to week.

You can read more about Rollover and Carry Forward Volume in the Cycle Pay section.
Template Name
The template defines a name in the <ComPeriod> element via the Name attribute.
<?xml version="1.0" encoding="UTF-8"?>
<Template>
  <ComPeriod TrackRealtimeRankAdvancements="False" EnrollTree="Enrollment" RoundPrecision="3" Usage="CommissionRun" Name="XMLBinaryWeekly">

   ...
   ...
   ...

  </ComPeriod>
</Template>
Typically, the template name is the same as the period it represents (Weekly, Monthly, Bi-Monthly, etc.). Because this is a Binary template, the period is weekly.
Read more: Template Name.
You can read more about the XML Editor here: Using the XML Compensation Plan Editor.
Volume Range
<VolumeRanges> are mostly used for setting the date ranges to count volume. The <VolumeRange> in <ComPeriod> is the master default used by everything. You can see it defines Weekly in the Name attribute:
<ComPeriod TrackRealtimeRankAdvancements="False" EnrollTree="Enrollment" RoundPrecision="3" Usage="CommissionRun" Name="XMLBinaryWeekly">
    <VolumeRange>
      <VolumeRange Name="Weekly">
        <RangeType>
          <Weekly WeekBegin="Monday"  />
        </RangeType>
      </VolumeRange>
    </VolumeRange>
</ComPeriod>
Within <RangeType>, you can determine when the week will begin. In this case, WeekBegin="Monday".
Read more: Volume Ranges (Data Range).
Volumes
The <Volumes> section defines different kinds of volume your plan needs to track, as well as how to count them.
<Volumes>
    <VA_Personal Name="QS" AssociateBaseTypes="">
        <VolumeType>
            <DefVolType VolumeGroup="QV"/>
        </VolumeType>
    </VA_Personal>
    <VA_Personal Name="CS" AssociateBaseTypes="">
        <VolumeType>
            <DefVolType VolumeGroup="CV"/>
        </VolumeType>
    </VA_Personal>
    <VA_RetailRollup Name="PS">
        <VolumeType>
            <DefVolType VolumeGroup="QV"/>
        </VolumeType>
    </VA_RetailRollup>
    <VA_RetailRollup Name="RRCV">
        <VolumeType>
            <DefVolType VolumeGroup="CV"/>
        </VolumeType>
    </VA_RetailRollup>
</Volumes>
Each volume assigns a name that the template references throughout.
Read more: Defining Volumes.
Tree Volumes
<TreeVolumes> is different from <Volumes> because they sum up each person's downline volume. The previous <Volumes> didn't reference a tree but assigned values to individuals.
All you need to do is:
-
Name the new
TreeVolume(e.g.,<TreeVolume Name="">) -
Reference a
TreeFor example:
"Enrollment""Unilevel""Binary""Matrix"
-
Reference a
Volumedefined in the previous section (Volume="RRQV").
In the template:
<TreeVolumes>
    <TreeVolume Volume="QS" Tree="Enrollment" Name="EQV" />
    <TreeVolume Volume="PS" Tree="Binary" Name="BQV" />
    <TreeVolume Volume="RRCV" Tree="Binary" Name="BCV" />
</TreeVolumes>
One way to determine what type of compensation plan an XML template is is to inspect what type of Trees it uses. As you can see in the preceding example, the Tree attribute is set to Binary, as well as Enrollment.
The <TreeVolumes> reference the Volumes defined in the previous section. Each one assigns a name (for example, Name="EQV"). The template references these names throughout, such as in the following example:
  <Pools>
    <GVPaymentPool GVPercent="50" TreeVolume="EQV" Name="MasterPool" />
  </Pools>
  <PVAccumulator Volume="QS" />
  <GroupVolumeTree TreeVolume="EQV" />
  <StrongWeakTreeVolume Volume="EQV" />
Rules
A Rule consists of conditions required to meet that Rule. They’re used for qualifying and defining ranks and bonuses. The template references them in other Rules as requirements Associates or their downline have to meet.
Read more: Creating Rules.
This section breaks down some of the template's Rules:
Associate Types
In this section, you'll see how to define your Associate Types. There are three default Base Associate Types:
- Distributor
- Retail Customer
- Preferred Customer
More Associate Types can be added when necessary.
You can read more about Base Associate Types in the following Help Center article: Base Associate Types, Associate Types, and Price Groups Explained.
The following example demonstrates setting up each Associate Types Rule definition. As you can see, the Rule assigns the name "A":
    <Rule Description="Associate" Name="A">
      <And>
        <AssociateTypeCondition AssociateBaseType="1" />
      </And>
</Rule>Further along in the template, you'll see
<MeetsRule Rule="A" />. The element checks to see if the Associate Type is 1.
    <Rule Description="Retail" Name="RC">
      <And>
        <AssociateTypeCondition AssociateBaseType="2" />
      </And>
</Rule> <Rule Description="Preferred Customer" Name="PC">
<And>
<AssociateTypeCondition AssociateBaseType="3" />
</And>
</Rule>Ranks
<Rule Name="R20" Description="Coordinator Rank">
      <And>
        <LegGVCondition Tree="BQV" Leg="weak" Min="5000" Max="-1" RolloverMax="-1" NewMax="-1" Description="Lesser Leg QV" />
        <LegWithRule Tree="Binary" Leg="left" Count="2" Rule="Act" PersonalEnrolled="True" Description="Active on Left" />
        <LegWithRule Tree="Binary" Leg="right" Count="2" Rule="Act" PersonalEnrolled="True" Description="Active on Right" />
      </And>
      <Result>
        <SetRank Rank="20" />
      </Result>
</Rule>
With this Rule, to achieve the "Coordinator Rank", you need to enroll an Active person on your Left and Right. This is normal for Binary comp plan types. They are balancing both sides. You want to discourage the practice of only placing enrollees on one side versus the other. Requiring this balance to achieve rank is a good idea.
The following lines show this:
<LegWithRule Tree="Binary" Leg="left" Count="2" Rule="Act" PersonalEnrolled="True" Description="Active on Left" />

<LegWithRule Tree="Binary" Leg="right" Count="2" Rule="Act" PersonalEnrolled="True" Description="Active on Right" />
For this example, Count=2. To achieve this rank, you need 2 Active Associates on your Left and Right.
⚠Important
You have to enter Rank values in the Database manually. Learn how in Adding Rank Values to the Database.
Bonus Pay
Bonus Pay awards you a percentage of whatever the price a customer paid for a product right away. In the following code example, if a Retail Customer (Type 2) (Option="RC") paid $100 for their product, then you'll get 20 percent (BonusPay Percent="20").
<Rule Description="Customer Profit Retail" Name="CPR">
    <And>
        <MeetsRule Rule="A" />
    </And>
    <Result>
        <Payments>
            <Payment Pool="MasterPool" Bonus="Customer Profit Retail" Tag="" MetaData="">
                <Group>
                <HasStat Option="RC">
                    <Group>
                        <GenerationGroup Tree="Enrollment" Generation="1" CompressOption="" BeginLevel="1" />
                    </Group>
                </HasStat>
                </Group>
                <Source>
                    <BonusPay Comment="" Percent="20" />
                </Source>
            </Payment>
        </Payments>
      </Result>
</Rule>
The template also features the same Rule, but for a Preferred Customer Type (Type 3).
<Rule Description="Customer Profit PC" Name="CPPC">
    <And>
        <MeetsRule Rule="A"/>
    </And>
    <Result>
        <Payments>
            <Payment Pool="MasterPool" Bonus="Customer Profit PC" Tag="" MetaData="">
                <Group>
                    <HasStat Option="PC">
                        <Group>
                            <GenerationGroup Tree="Enrollment" Generation="1" CompressOption="" BeginLevel="1"/>
                        </Group>
                    </HasStat>
                </Group>
                <Source>
                    <BonusPay Comment="" Percent="15"/>
                </Source>
            </Payment>
        </Payments>
    </Result>
</Rule>
Usually, Preferred Customers pay a little less for their products. The Associate likewise receives a slightly lower bonus percentage (15).
Fast Start Bonus
For this section, it's helpful to know how to set up inventory. Read the following Help Center guide: Inventory Items and Pricing Guide.
The Fast Start Bonus ties into the Inventory Item configuration Fast Start tab.
In the XML, Fast Start Bonus are set up like this:
<Rule Description="Fast Start" Name="FS">
      <And>
        <MeetsRule Rule="A" />
        <MeetsRule Rule="Act" />
      </And>
      <Result>
        <Payments>
          <Payment Pool="MasterPool" Bonus="Enroller Bonus" Tag="" MetaData="">
            <Group>
              <GenerationGroup Tree="Enrollment" Generation="1" CompressOption="" BeginLevel="1" />
            </Group>
            <Source>
              <IndexedBonusPay Index="1" Comment="Fast Start 1" Percent="100" />
            </Source>
          </Payment>
          <Payment Pool="MasterPool" Bonus="Enroller Bonus" Tag="" MetaData="">
            <Group>
              <GenerationGroup Tree="Enrollment" Generation="2" CompressOption="" BeginLevel="1" />
            </Group>
            <Source>
              <IndexedBonusPay Index="2" Comment="Fast Start 2" Percent="100" />
            </Source>
          </Payment>
          <Payment Pool="MasterPool" Bonus="Enroller Bonus" Tag="" MetaData="">
            <Group>
              <GenerationGroup Tree="Enrollment" Generation="3" CompressOption="" BeginLevel="1" />
            </Group>
            <Source>
              <IndexedBonusPay Index="3" Comment="Fast Start 3" Percent="100" />
            </Source>
          </Payment>
          <Payment Pool="MasterPool" Bonus="Enroller Bonus" Tag="" MetaData="">
            <Group>
              <GenerationGroup Tree="Enrollment" Generation="4" CompressOption="" BeginLevel="1" />
            </Group>
            <Source>
              <IndexedBonusPay Index="4" Comment="Fast Start 4" Percent="100" />
            </Source>
          </Payment>
          <Payment Pool="MasterPool" Bonus="Enroller Bonus" Tag="" MetaData="">
            <Group>
              <GenerationGroup Tree="Enrollment" Generation="5" CompressOption="" BeginLevel="1" />
            </Group>
            <Source>
              <IndexedBonusPay Index="5" Comment="Fast Start 5" Percent="100" />
            </Source>
          </Payment>
          <Payment Pool="MasterPool" Bonus="Enroller Bonus" Tag="" MetaData="">
            <Group>
              <GenerationGroup Tree="Enrollment" Generation="6" CompressOption="" BeginLevel="1" />
            </Group>
            <Source>
              <IndexedBonusPay Index="6" Comment="Fast Start 6" Percent="100" />
            </Source>
          </Payment>
          <Payment Pool="MasterPool" Bonus="Enroller Bonus" Tag="" MetaData="">
            <Group>
              <GenerationGroup Tree="Enrollment" Generation="7" CompressOption="" BeginLevel="1" />
            </Group>
            <Source>
              <IndexedBonusPay Index="7" Comment="Fast Start 7" Percent="100" />
            </Source>
          </Payment>
          <Payment Pool="MasterPool" Bonus="Enroller Bonus" Tag="" MetaData="">
            <Group>
              <GenerationGroup Tree="Enrollment" Generation="8" CompressOption="" BeginLevel="1" />
            </Group>
            <Source>
              <IndexedBonusPay Index="8" Comment="Fast Start 8" Percent="100" />
            </Source>
          </Payment>
          <Payment Pool="MasterPool" Bonus="Enroller Bonus" Tag="" MetaData="">
            <Group>
              <GenerationGroup Tree="Enrollment" Generation="9" CompressOption="" BeginLevel="1" />
            </Group>
            <Source>
              <IndexedBonusPay Index="9" Comment="Fast Start 9" Percent="100" />
            </Source>
          </Payment>
          <Payment Pool="MasterPool" Bonus="Enroller Bonus" Tag="" MetaData="">
            <Group>
              <GenerationGroup Tree="Enrollment" Generation="10" CompressOption="" BeginLevel="1" />
            </Group>
            <Source>
              <IndexedBonusPay Index="10" Comment="Fast Start 10" Percent="100" />
            </Source>
          </Payment>
        </Payments>
      </Result>
</Rule>
Fast Start Bonus is an incentive rewarding Associates immediately after their first sale. Use the Fast Start tab to set a bonus structure. For more information on entering a Fast Start structure in Corporate Admin, read Adding a Fast Start Bonus Structure.
From the preceding code example, you have this line:
<Source>
<IndexedBonusPay Index="1" Comment="Fast Start 1" Percent="100" />
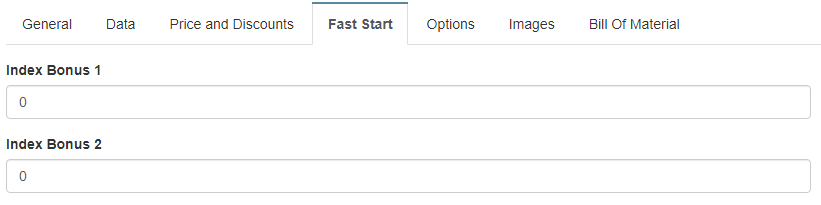
</Source>With this snippet, the Associate receives 100% of the number entered in the Fast Start > Index Bonus 1 field.
Under the Fast Start tab, you'll find ten Index Bonus fields. Each field represents an Associate level. Index Bonus 1 is the immediate upline to the customer buying the product. Index Bonus 2 is Index Bonus 1's upline sponsor, so-on up the Tree.
- Enter data in each necessary field.
- Click Save Changes.
To recap:
- The comp plan has a percentage amount for each Index/Generation.
- Associates receive the XML percentage amount of what's entered in their Index Bonus field.
For example, you are an Associate, and you sponsor someone to buy a kit. This kit's Index Bonus 1 field has 50 entered, and Index Bonus 2 has 20 entered. When the customer buys the kit, you get 50, and your Sponsor gets 20.
Cycle Pay
With Cycle Pay, the plan compares the volumes on the Left and Right. The higher volume (Strong Leg) subtracts, the lower volume (Weak Leg). The Associate receives a percentage of the remaining volume. This remaining volume becomes Carry Over Volume that rolls over into the next cycle.
In the next cycle, the process begins again. The Strong Leg subtracts the Weak Leg. The Carry-Over Volume from the last cycle then adds to the remaining volume. The Associate gets a percentage of this number.
The following Rule defines a cycle pay:
<Rule Description="Team Commission" Name="TC">
      <And>
        <MeetsRule Rule="A" />
      </And>
      <Result>
        <Payments>
          <Payment Pool="MasterPool" Bonus="Team Commission" Tag="" MetaData="">
            <Group>
              <CurrentAssociateGroup />
            </Group>
            <Source>
              <WeakLegVolumePay TreeVolume="BCV" PercentPay="15" WeakLegVolume="200" StrongLegVolume="400" TotalMaxVolume="133600" Comment="Lessor Leg" />
            </Source>
          </Payment>
        </Payments>
      </Result>
</Rule>
The most important element in this Rule is the following statement:
<WeakLegVolumePay TreeVolume="BCV" PercentPay="15" WeakLegVolume="200" StrongLegVolume="400" TotalMaxVolume="133600" Comment="Lessor Leg" />With this statement, every time:
- Weak Leg earns 200 volume
- Strong Leg earns 400 volume
You get 15 percent of the remaining volume.
With Cycle Pay, take the Weak Leg volume and subtract it from the Strong Leg volume. This leaves you with 200 remaining volumes. Because the Associate gets 15 percent of that volume, they will earn 30 for the cycle. The remaining 200 becomes Carry Over Volume.
In the next cycle, the Strong Leg earns 500, and the Weak Leg earns 200. 200 subtracts from 500, leaving 300. Now the Carry Over Volume (200) adds in, resulting in 500 volume. The Associate gets 15 percent of this, so they receive 75.
Check Match
<Rule Description="Check Match" Name="TC2">
      <And>
        <MeetsRule Rule="A" />
      </And>
      <Result>
        <Payments>
          <Payment Pool="MasterPool" Bonus="Match Bonus" Tag="" MetaData="">
            <Group>
              <GenerationGroup Tree="Enrollment" Generation="1" BeginLevel="1" />
            </Group>
            <Source>
              <BonusMatchPay MatchBonus="Team Commission" Percent="10" Comment="Generation 1 10%" />
            </Source>
          </Payment>
        </Payments>
      </Result>
</Rule>
This is an example of a Check Match bonus. First, this Rule looks to see if an Associate is a Distributor (Associate Type 1) with this line:
<MeetsRule Rule="A">If you recall in the Associate Types section, Associate Type 1's name is "A". If Associate Type is 1, then the Check Match looks at the Associate's Generation 1:
<Group>
    <GenerationGroup Tree="Enrollment" Generation="1" BeginLevel="1" />
</Group>
And awards them 10 percent of their Generation 1's volume:
<Source>
    <BonusMatchPay MatchBonus="Team Commission" Percent="10" Comment="Generation 1 10%" />
</Source>
Updated about 1 year ago