Deploying A Build Version
Learn how to deploy a Build Version to Stage or Production environments
With an understanding of Building the Client Extension let's cover how to deploy a Build Version to environments.
Deployment Overview
The Client Extension deploys the docker image from Building the Client Extension to Directscale's Azure Kubernetes Cluster hosted in the Azure West US Datacenter.
There will always be at least 2 instances of the Client Extension running in Kubernetes for redundancy.
Blue-Green Deployment
Docker images are deployed with Kubernetes using a Blue-Green deployment strategy. This strategy ensures high availability while deploying the new version because there is no downtime. If there is any issue forwarding traffic to a new version during deployment then it will fail and roll back to the prior version.
Example of a blue-green deploymentA very simple explanation of how v2 of client code would be deployed when v1 is currently running.
- The first v2 container is created and is added to the pool when ready
- An existing v1 container is removed from the pool
- A second v2 container is created and is added to the pool when ready
- The second v1 container is removed from the pool
In order to prevent issues, client developers must write code that can run concurrently with the version deployed before because both of them will be running at the same time.
Auto-Configuration
Webhook, Process Hook, Merchants & Page registrations are all updated as part of the Deployment Process. See more about how this is done by reading Hosting with the C# Client Library.
Environment Variables
Environment Variables can be set on the machines hosting the Client Extension. They are set in the Deployment Options Modal displayed in Figure 2 below.
How to Deploy a Build Version
Ready to deploy your first build?Make sure the following items are configured on the Extension Settings page prior to creating your first deploy.
- At least one DirectScale Secret is generated
- The Extension Secret is populated with a secure key
- Log into your Corporate Admin.
- Select 'Tools' and then 'Developer Tools' from the main menu.
- Click on 'Deployment'
- If applicable, use the search bar to find the Build Version you want to deploy
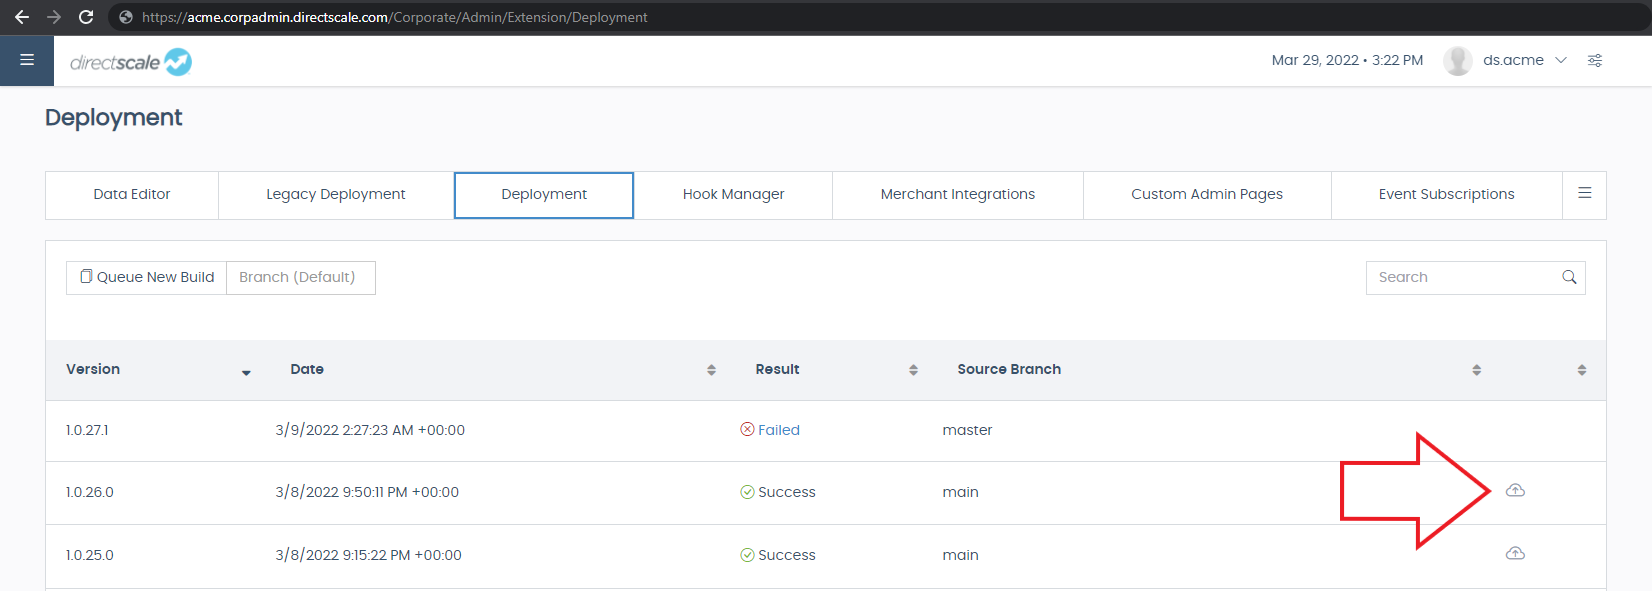
- Click the Deploy Icon for the Build Version.

Figure 1: An image displaying the Deploy Icon for Build Version 1.0.26.0
-
Add, edit or delete the Environment Variables that will be set on the machines hosting the code
The Deployment Options Modal is populated with the environment variables from the prior deployment.
Figure 2: An image displaying the Deployment Options Modal for Build Version 1.0.26.0
When a client creates their first deployment the Deployment Options Modal will be populated with the Environment Variables used by the ITokenProvider interface.
- DirectScaleToken: The API key that the Client Extension sends with all HTTP requests to Directscale
- DirectScaleServiceUrl: The URL of theCorporate Admin Application
- ExtensionToken: The API key that the Client Extension Uses to Authenticate incoming requests
Any environment variable that starts with "ExtensionToken" will be considered a valid Extension API key. This enables a list of keys that are accepted so that keys can be changed without any downtime. See how to change Extension API keys with no downtime by reading Managing API Keys.
Is the ITokenProvider interface overriden?If the ITokenProvider interface is overridden in client code then the Environment Variables displayed Figure 2 most likely are not correct.
The way the C# Client Library gets the 3+ values it needs to interact with the extension and authorize incoming requests can be overridden by registering an implementation of ITokenProvider interface in the startup.cs file. Overriding the ITokenProvider interface is considered advanced and is not recommended for most clients.
- Click the Deploy Button
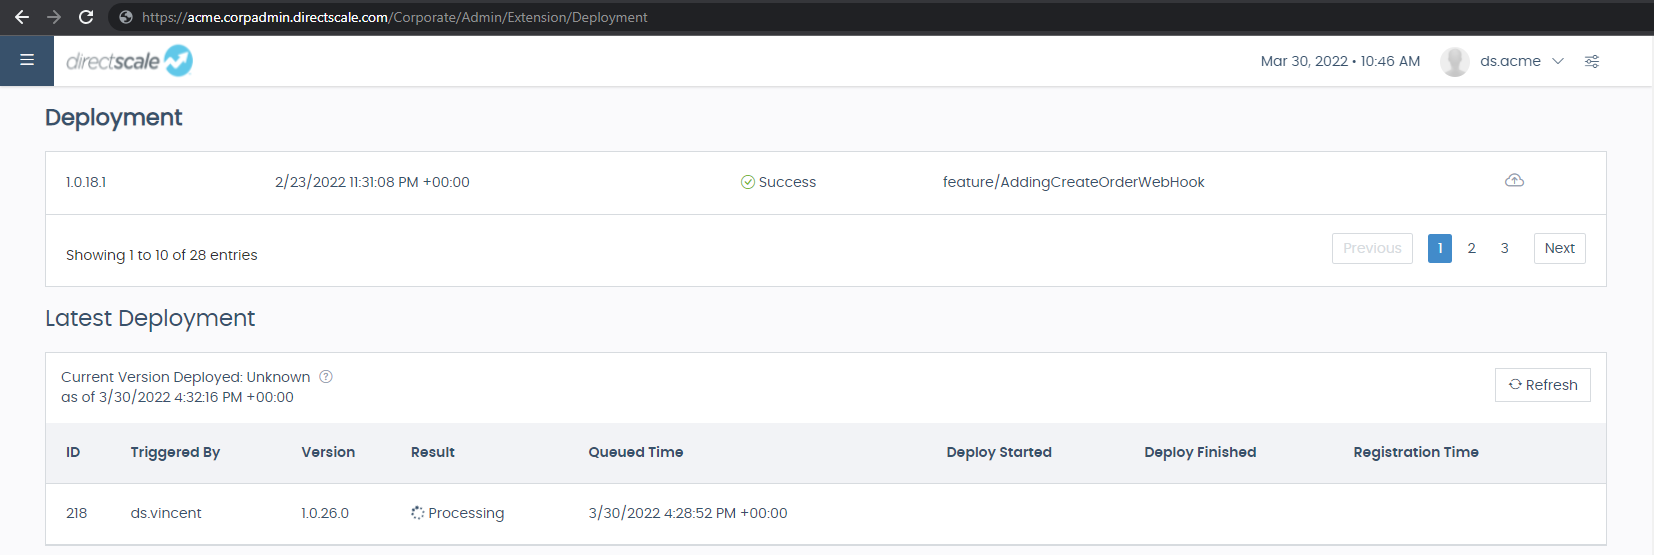
A new Deployment should appear in the Latest Deployment section with a result of Queued or Processing. When the build has finished processing it should show a Success result. See Failed Deploys if it does not.

Figure 3: An image displaying a Deployment under the Latest Deployment section for Build Version 1.0.26.0
The Result of a Deployment will be one of the following results
- Processing
- Success
- Failed
Failed Deploys
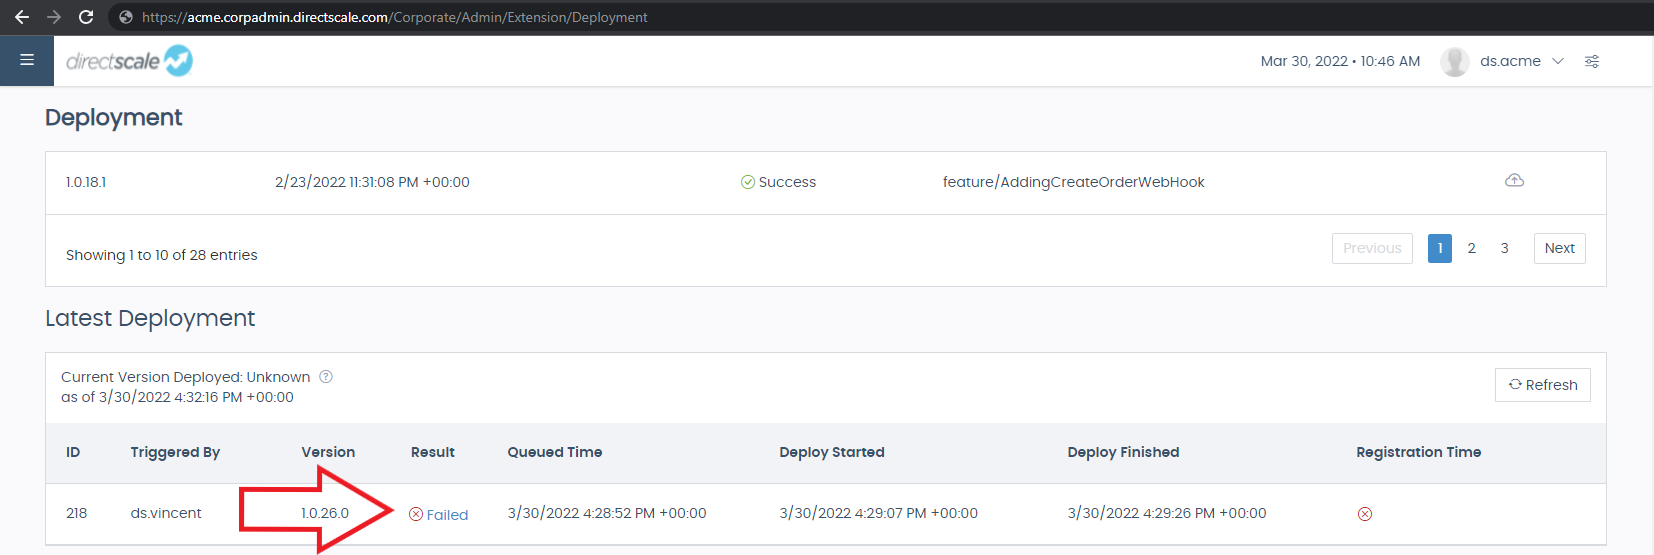
If a deployment failed then the steps that did not execute or had errors will display an ❌ icon. The Result text will be a hyperlink to see more information about errors that occurred.

Figure 4: An image displaying a Failed Deployment under the Latest Deployment section for Build Version 1.0.26.0
Deployment Steps
Queued TimeTimestamp when the Deployment was created.
Deploy StartedTimestamp when the first machine with the new code is being created and added to the load balancer.
Auto-Configuration Step 1Configurations for WebHooks, Process Hooks, Merchants, or Pages that were removed from the prior version will be deleted before the first machine is added to the load balancer. This is done by calling the Remove Deleted Registrations API that is added to the Client Web Application with the Directscale Middleware.
Deploy FinishedTimestamp when the last machine with the new code was added to the load balancer.
Registration TimeTimestamp when Configurations were updated to match the configurations made in the `services.AddDirectscale() method in the StartUp.cs file of the client source code.
Auto-Configuration Step 2Configurations are updated by calling the Update All Registrations API that is added to the Client Web Application with the Directscale Middleware.
Updated 8 months ago
